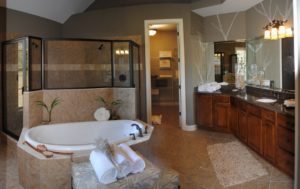
When it comes to portraying your communities and homes in their best light, the old adage is true – a picture is worth a thousand words. A good photo or two can convey so much about your product – whether it’s a great shot of your gorgeous kitchen or a lifestyle photo showing your target market. A mix of product and lifestyle photos is the best way to show people what your neighborhoods are all about!
So why do so many home builders give photography short shrift? The primary reason is usually that there are a million other things to do. Unfortunately, when it comes time to update the website or run new ads or create new marketing pieces, the lack of photos becomes a big deal. So then, they send their salesperson out to grab a few shots with a smart phone. Don’t your homes deserve better?
There are some basic rules for photographing exteriors and interiors:
EXTERIORS
- Never photograph the front of the home while it is in shadow. Always wait until the time of day when it is in full sunlight. A home that is shot in shadow can’t be sufficiently lightened up to show clear details and will look muddy and dull.
- Never photograph outside on a cloudy day.
- Clean up the site before shooting to avoid costly retouching later.
- If possible, scrape off manufacturer’s stickers on windows, using a razor scraper. Stickers are unsightly and are time-consuming to retouch.
- Look around for anything that might spoil the photo, for example:
- Are the windows or garage door open?
- Are the trashcans visible?
- Is the garden hose running across the lawn?
- Is the construction debris in the back yard visible from the street?
- Is the front door still unpainted bare wood?
- Is the house missing light fixtures, door hardware, window trim, etc.?
- Are there muddy tire tracks from construction vehicles in the driveway?
- Avoid shooting through trees that cover the front of the house.
- If an object cannot be moved (like a permanent sign or a small tree), shoot around it, so that it isn’t blocking any part of the front of the house.
- Pick the most flattering angle. For example, shooting from the garage side might make the house look like it’s a big garage with a tiny house stuck to it.
- Try to focus on the front entryway. Avoid angles that obscure the front door.
- Consider evening or twilight shots, with all the lights on inside the house.
- Remove window screens. Windows reflect light better and give a more “lived-in” look without the window screens.
- Pay attention to window reflections. Is the construction vehicle parked across the street reflected in first floor windows? If possible, remove any distractions.
INTERIORS
- Never shoot inside with direct sunlight streaming in through the windows. Photos with light-flooded windows are nearly impossible to retouch.
- Always shoot on a sunny day, but not when the sun is shining directly into the room.
- Pay attention to what’s outside the windows. Are there trucks or debris that can be moved? A swing set from the neighbor’s house? If the view is less than spectacular, consider angles that are shooting along the windows, rather than straight out the window. Remove window screens before shooting!
- Try to highlight unique architectural features. Use hidden interior lights to brighten up dark corners, a cathedral ceiling that might be in shadow, dark walls, etc.
- Get the room as bright as possible using the artificial lights that are in the room. Turn on all the lamps and ceiling lights.
- Avoid shots that look like a furniture showroom. Shift or remove some furniture to avoid a cluttered or cramped look.
- While walking backwards, use a broom to brush out any distracting footprints in carpets before shooting.
- Don’t hurry the shoot. Experiment with lighting to highlight some areas and downplay others.
- Be aware of the sight lines. Shoot from angles that make the room look as large as possible.
- Consider shooting at twilight, or in total darkness. Shots taken in the middle of the night, properly lit from the outside, can give the illusion that a photo was taken on a sunny day. The more you can control the lighting, the better the interior shots will be.
When it comes to choosing lifestyle photography, think about who is living in your homes. Is it young families, young couples, active adults? Do you have amenities that can be showcased – a fitness center, clubhouse, pool, parks, etc? Are your residents avid golfers? Or are they hikers or bikers? All of these demographics can be shown with lifestyle photography – your own or images purchased from a stock photography site.
And don’t forget about video! Many builders have begun to include simple videos taken with a smart phone on their websites. In this case, the resulting media doesn’t have to be high end. People like to watch videos, even if it’s just a builder taking their iPhone through a model or a happy family gushing about how much they love their new home!
Myers Barnes is America’s favorite new home sales trainer, author, speaker and consultant. For more information, please visit www.myersbarnes.com.


